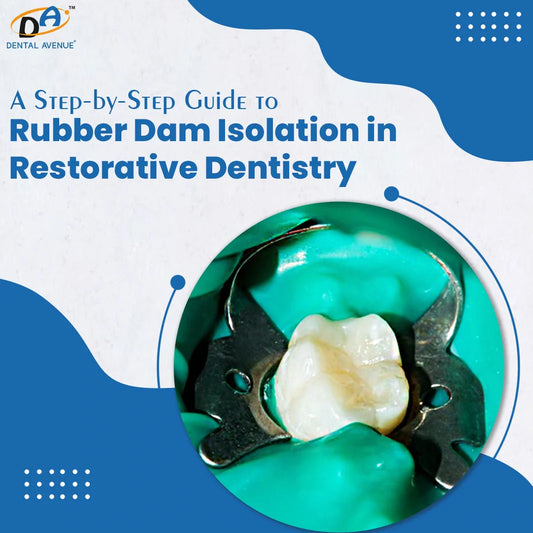
Rubber dams have been used in dentistry for 120 years, although more prevalent in Western countries and not widely accepted by many operators. A study conducted in 2021, showed using a rubber dam leads to a lower failure rate of dental restorations as compared with the traditional and most commonly used cotton roll usage after six months.
A sheet of latex used to isolate the treatment area from the oral and para-oral structures is called the rubber dam, and this is achieved by making some holes in the rubber dam material using a rubber clamp and the hole template, followed by placement of frame and seating at the concerned area of the arch. Rubber dam isolation is useful in an array of dental procedures ranging from root canal, crown, bridge, veneer, etc.
Rubber Dam Isolation Benefits:
Dr. Sanford C Barnum introduced the rubber dam, and the potential advantages of the dental dam isolation include superior seclusion of the tooth to be treated from the saliva in the mouth helping in enhanced visibility, reduced mirror fogging, soft tissue retraction, etc.
Let's discuss a few of the benefits in brief:
-
Dry Working Area
The dam creates a controlled, and clean working area resulting in better and lasting restorations along with protection of the soft tissues as dental procedures require the use of an endo motor, reporter, and burs devices and a dental dam isolation protects the soft tissues of the mouth from potential trauma caused by the instruments.
2. Visibility
Rubber dam isolation enhances visibility and provides better visual contrast and a better operative view. Usage of Dental Dams helps retract the tissues that surround the teeth to allow the operator clear access to the areas in between teeth that require restoration, as well as easier access to areas of the cavity. By eliminating the distraction of tissues and even adjacent teeth, the operator can focus on the concerned tooth.
3. Prevents Swallowing Dental Materials
The dam prevents the patient from swallowing dental materials. Rubber dam isolation creates a layer of protection between the oral structure and adjoining tissues, so the patient has no chance of ingesting the restoration material.
4. Infection Control
Dental procedures usually range between 15-40 minutes, and the patient usually coughs during that span, which can send potentially infectious aerosol droplets into the surrounding structure. A dental dam acts as a shield and prevents particle entry for patient safety. Also, prevents oral microbes from entering the canal leading to infection.
5. Accuracy for Dental Professionals
Dental dams allow operators to isolate the areas of the mouth in which they will fill the restoration or bond composite resin, endo post, etc. This isolation removes the distraction of constant tongue movement and adjacent tissues. With the help of a rubber dam isolation, there is reduced mirror fogging that interferes with the process leading to efficient filling and successful restoration.
6 Steps to Rubber Dam Isolation in Restorative Therapy:
These 6 M’S can change the operator's opinion towards the rubber dam technique and once done correctly, then it’s a game changer for the clinic.
-
Material:
Rubber dams are classified into 3 groups based on thickness. More tissue retraction can be achieved by the thicker dam and for daily restorative fillings the medium thickness is good as it provides both tissue retraction and excellent tear resistance. If in a particular case, more retraction is needed for a better operative view, then the dam can be supplemented with a retraction cord.

2. Making the right clamp selection:
Rubber dam has clamps for attachment with the teeth and they are classified into 2 types, retraction, and retentive clamps. The clamps have a bow, jaw, and holes for removing the dental dam after the procedure. Clamps are of 37 variants however based on the usage there are 6 clamps known that fulfil most of the cases criteria and are known as the universal kit comprising of W3, W2, W8A, 212, modified 212, and the Brinker clamp 4 (or B4, the only retraction clamp in the kit)

3. Making the right perforation:
Operators might face difficulty while performing this step for the particular teeth as in restorative dentistry it is preferred to isolate 3-4 teeth in a row and for this experienced dentists have recommended using a combination of three perforation sizes.
For example- If the operator has decided to keep the molar tooth as the one that will hold the retentive clamp, then the largest perforation size in the rubber dam frame/template should be used. Another crucial element is the distance between the perforations. For every case, 5- 6 mm perforations will help achieve ideal results.

4. Making the attachment:
The next step is the attachment of the dam to the clamp. Clamps included in the universal feature are wingless. The ideal procedure involves securing the clamp onto the retentive tooth and stretching the dam over it. However, this method can present certain challenges such as Overstretching the dam, which may cause tearing and inadequate security of the clamp, potentially resulting in swallowing.
To perform this, one hand holds the clamp forceps while the other holds the dam. The clamp jaws are opened and placed over the tooth, releasing them once they reach the cervical third level. Subsequently, gently stretch the dam over the clamp jaws. Using dental floss, lightly extend the dam over each tooth to be isolated, and finally, secure the dam at the mesial end of the abutment tooth using a latex rubber dam stabilising cord.

5. Making transposition:
Inverting the rubber dam is a critical step because one of the primary purposes of using a dental dam is to separate the tooth from the surrounding structures. To achieve this effectively, the rubber dam must be properly inverted into the gingival sulcus. There are two methods to accomplish this, depending on the depth of the tooth preparation:
- 1. When there is an ample amount of tooth structure above the gum line (supragingival), the rubber dam can be inverted easily by directing air with an air/water syringe around the cervical area of the tooth undergoing restoration. Simultaneously, use a cord-packing instrument to push the dam into the sulcus.
- 2. If the margins of the tooth preparation are below the gum line (subgingival), a floss ligature becomes necessary to push the rubber dam apically and achieve proper inversion.

6. Dam Removal:
Coming on to the last step, for rubber dam removal stretch the dam laterally until the interdental dam between each perforation becomes visible. Use round-end scissors to trim the interdental dam followed by removing the retentive clamps to release the dam.
For more knowledge watch this video on YouTube to understand this blog for practical application
Conclusion
To conclude, rubber dam usage is a vital tool in dental procedures, providing isolation and moisture control for optimal outcomes. Its proper application, including inversion into the gingival sulcus and careful handling to avoid tearing, is crucial. With the use of appropriate techniques such as stretching, cutting, and clamp removal, the rubber dam can significantly enhance clinical efficiency and patient comfort.
Frequently Asked Questions and Answers:
Why is Rubber Dam Isolation important in dental treatments?
Rubber dam isolation is a significant step as it keeps the teeth isolated from the para-oral structures leading to less chances of contamination and better enhanced results. Rubber dam helps in improving the comfort of the dentist and patient along with moisture control, a sterile environment, etc.
What are the components of a Rubber Dam Kit?
Rubber dam consists of the following instruments in the kit-
- Rubber dam frame
- Rubber dam punch
- Forceps
- Clamps
- Rubber dam material
- Template
Is Rubber Dam Isolation used in all types of restorative dentistry?
Yes, in most of the cases of restorative dentistry, including endodontics, prosthodontics, and general restorative treatments rubber dams are used.

